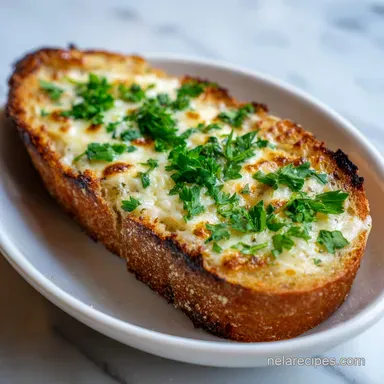
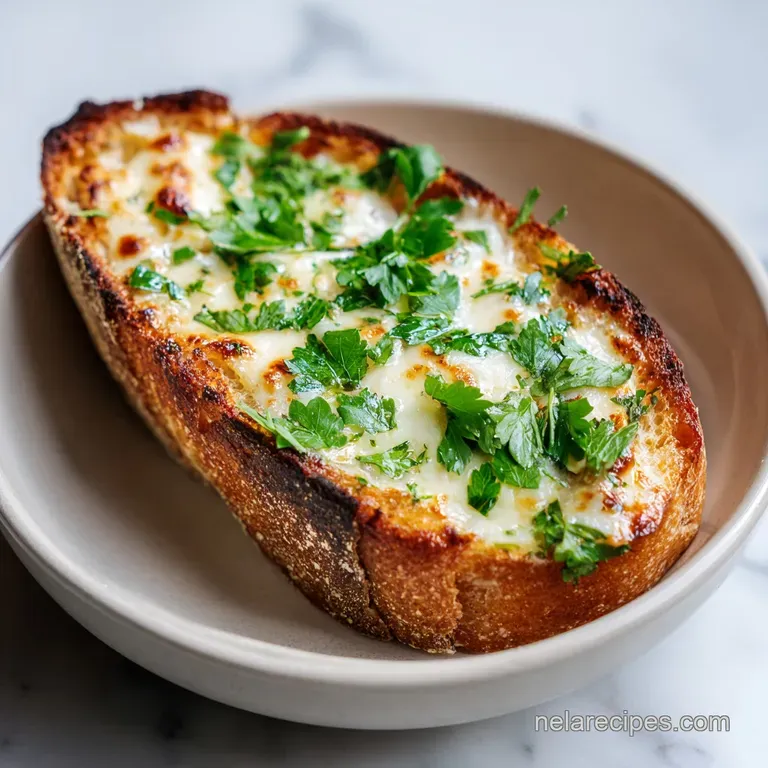
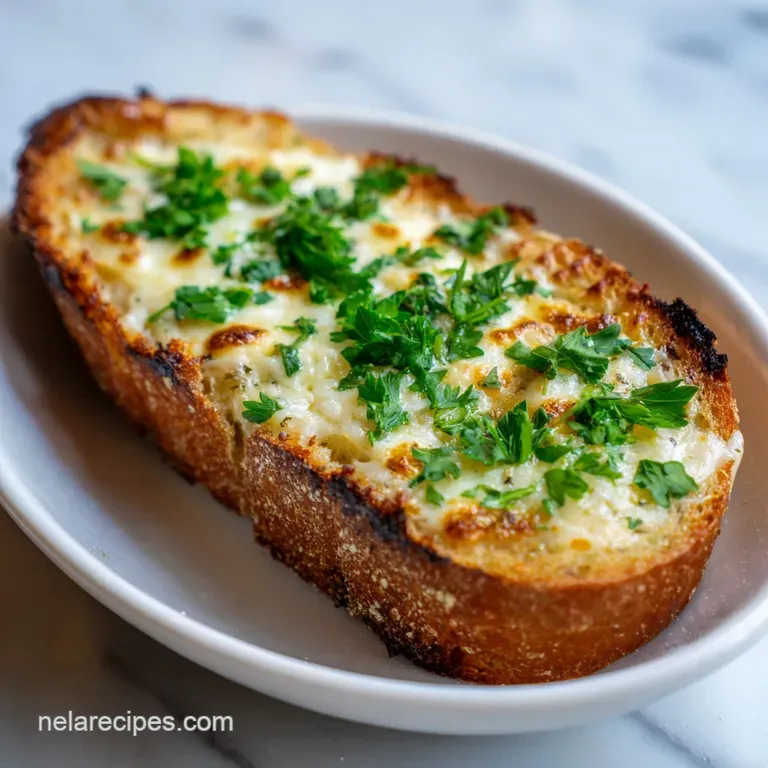
Cheesy Garlic Bread: Crispy and Golden
- Time: 5 min active + 15 min baking = Total 20 minutes
- Flavor/Texture Hook: Shattering crust with a velvety, bubbly cheese center
- Perfect for: Quick weeknight sides or a crowd-pleasing party appetizer
The smell of toasted garlic hitting a hot oven is basically a hug in scent form. I remember one Friday night when I was trying to impress some friends with a fancy dinner, and I spent way too much time worrying if my bread was "artisanal" enough.
I thought I needed a fermented sourdough or some expensive bakery loaf to make it work, but honestly, the store-bought French baguette I grabbed at the last minute actually performed better because of its consistent crumb.
Forget the idea that you need a professional bakery loaf to get that restaurant style result. A standard baguette is actually the hero here because it's sturdy enough to hold a heavy layer of cheese without collapsing into a mushy mess. When you get that first bite and the crust shatters, it's a total win.
This Cheesy Garlic Bread is designed for those of us who want the maximum flavor with the least amount of stress. We aren't doing anything overly complicated, just focusing on the right sequence of layering to keep the bread crisp and the cheese gooey.
Trust me, once you see the deep mahogany edges on the crust, you'll never go back to the frozen stuff.
Making the Best Cheesy Garlic Bread
The magic of this recipe comes down to how the fat interacts with the heat. Most people just throw butter on bread, but if you stir the garlic and parsley into the melted butter rapidly, you create a temporary emulsion.
This ensures the garlic doesn't just clump in one spot but spreads evenly, giving every single bite that punchy, aromatic hit.
I've noticed that the biggest mistake people make is using cold butter or not preheating the oven fully. You want that bread to hit a searing hot surface so the bottom crisps up while the cheese melts. It's all about that contrast between the crunchy exterior and the soft, buttery interior.
If you're looking for a complete meal, this pairs beautifully with a garlic cream shrimp linguine for a night that feels like a bistro dinner but takes almost no effort.
The Secrets Behind the Sizzle
- Fat Barrier: The butter creates a protective layer that stops the bread from drying out in the high heat.
- over High heat Melt: 400°F is the sweet spot where cheese bubbles and browns before the bread turns into a crouton.
- Garlic Suspension: Stirring the garlic into melted butter distributes the oils, preventing raw garlic pockets.
- Cheese Weight: Using a mix of mozzarella and parmesan provides both the stretch and the salty, sharp finish.
| Method | Time | Texture | Best For |
|---|---|---|---|
| Oven Bake | 15 mins | Evenly crispy, bubbly | Whole loaves, party platters |
| Stovetop | 8 mins | Toasted bottom, softer top | Single slices, quick snacks |
| Air Fryer | 6 mins | Extra crunchy, fast | Small batches, late night |
Detailed Component Breakdown
Understanding why we use these specific ingredients helps when you're staring at an empty fridge and need to make a choice. It's not just about taste, it's about how they behave under the broiler.
| Ingredient | Science Role | Pro Secret |
|---|---|---|
| Unsalted Butter | Moisture barrier | Melt it slowly to avoid separating the fats |
| Fresh Garlic | Aromatic punch | Mince it fine so it doesn't burn in the oven |
| Mozzarella | Structural stretch | Shred it yourself for a more velvety melt |
| Parmesan | Salt and crust | Adds a nutty depth that balances the butter |
The Essential Pantry List
Gather everything before you start. Since this comes together so fast, you don't want to be hunting for the salt while your butter is cooling down.
- 1/2 cup (115g) unsalted butter, melted Why this? Provides the rich, creamy base for the garlic
- 4 cloves (20g) fresh garlic, minced Why this? Fresh has a sharper, more authentic bite
- 2 tbsp (8g) fresh parsley, finely chopped Why this? Cuts through the richness of the cheese
- 1/2 tsp (3g) kosher salt Why this? Enhances the garlic and cheese flavors
- 1 loaf (340g) French baguette Why this? Holds up well to heavy toppings
- 2 cups (225g) shredded mozzarella cheese Why this? Essential for the classic cheese pull
- 1/4 cup (25g) grated Parmesan cheese Why this? Creates a salty, browned crust
| Original Ingredient | Substitute | Why It Works |
|---|---|---|
| Unsalted Butter | Extra Virgin Olive Oil | Similar fat content. Note: Lacks the creamy taste, more Mediterranean style |
| Mozzarella | Provolone | Similar melt profile. Note: Stronger, smokier flavor than mozzarella |
| French Baguette | Italian Loaf | Similar structure. Note: Usually softer crumb, slightly less "shatter" |
| Fresh Parsley | Dried Parsley | Same herbal note. Note: Use 1 tbsp instead of 2; less vibrant color |
Right then, let's get into the actual flow of making this. The key is speed once the butter is ready, so have your bread sliced and your cheese measured out.
Step by step Cooking Flow
- Preheat your oven to 400°F (200°C) and line a baking sheet with parchment paper or aluminum foil. Note: This prevents the cheese from sticking to your pan
- In a small bowl, combine the melted butter, minced garlic, parsley, and salt. Stir rapidly for 30 seconds to ensure the garlic oils are fully suspended in the butter.
- Slice the baguette in half lengthwise and place the halves cut side up on the prepared baking sheet.
- Spread the garlic butter emulsion generously from edge to edge across the bread. Note: Don't miss the corners or they'll be dry
- Immediately cover the buttered surface with shredded mozzarella and grated Parmesan cheese.
- Bake for 10–12 minutes until the cheese is bubbling and golden and the edges are deep mahogany.
- Toggle the broiler for the final 60 seconds to achieve a shattering crust, watching closely to prevent burning.
- Remove from the oven and let it sit for 2 minutes before slicing into sticks. Note: This lets the cheese set so it doesn't slide off
Chef Note: If you want a really punchy flavor, rub a raw garlic clove on the crust of the bread before you slice it open. It adds a subtle, toasted garlic aroma to the outside of the loaf.
Fixing Common Baking Errors
Even with a simple recipe, things can go sideways. Usually, it's a temperature issue or a layering mistake. When making homemade cheesy garlic bread, the goal is balance.
Soggy Bottom Bread Issues
This usually happens if the oven isn't hot enough or if you put too much butter on a very soft bread. The butter soaks into the crumb instead of frying the surface. Make sure your oven is fully preheated to 400°F.
Burnt Garlic Bitterness
Garlic burns quickly at high temperatures. If your garlic looks black instead of golden, you might have minced it too finely or left it under the broiler too long. The cheese usually protects the garlic, but the edges are vulnerable.
Oil Puddles on Top
If you see pools of yellow oil on your cheese, it's often because the butter was too hot when applied or you used a low quality butter with high water content. Stirring the emulsion well helps keep the fat bound together.
| Problem | Root Cause | Solution |
|---|---|---|
| Cheese didn't brown | Oven temp too low | Increase temp or use the broiler for 60 seconds |
| Bread is too hard | Overbaked | Reduce bake time by 2 minutes |
| Bland taste | Not enough salt | Sprinkle a pinch of flaky salt over the cheese before baking |
Common Mistakes Checklist:
- ✓ Avoid using pre shredded cheese if possible (it has cellulose that prevents a velvety melt).
- ✓ Never skip the parchment paper, or you'll spend 10 minutes scrubbing burnt cheese.
- ✓ Don't overload the butter; too much will make the bread collapse.
- ✓ Always check the center of the loaf for bubbling cheese before removing from heat.
- ✓ Don't slice the bread too thin, or it won't support the cheese weight.
Adjusting the Batch Size
If you're cooking for just yourself or hosting a massive party, you can easily tweak this cheesy garlic bread recipe. Just keep the ratios the same.
Cutting it down (½ batch): Use half a baguette and 1/4 cup of butter. Use a smaller baking sheet (like a quarter sheet) to ensure the heat circulates properly. Reduce the bake time by about 2 minutes, as a smaller mass of cheese melts faster.
Scaling it up (2x-4x batch): When doubling the recipe, don't double the salt and parsley exactly - go for about 1.5x first and taste the butter. Work in batches if your oven is small; crowding the pans can lead to steam buildup, which kills the crunch.
For larger batches, I recommend lowering the temp to 375°F (190°C) and extending the time by 5 minutes to ensure the middle of the second loaf is fully cooked.
| If you want... | Do this... |
|---|---|
| Extra Crunch | Use a sourdough baguette and broil for 90 seconds |
| More Pull | Increase mozzarella by 1/2 cup and decrease Parmesan |
| Lower Fat | Replace half the butter with melted ghee or olive oil |
Truths About Garlic Bread
There's a lot of noise about the "right" way to do this. Let's clear a few things up.
The "Searing" Myth: Some people think you should sear the bread in a pan first to "seal" it. This is unnecessary. The high oven heat and the butter barrier do the job perfectly, and searing just adds an extra step that often leads to burnt bottoms.
The Powdered Garlic Debate: You'll see recipes calling for garlic powder. While it's convenient, it doesn't have the same aromatic complexity as fresh garlic. Powder is better for a dry rub, but for a butter based spread, fresh is the only way to go.
Storage and Waste Tips
If you actually have leftovers (which is rare in my house), you can keep them for a few days.
Fridge and Freezer: Store sliced pieces in an airtight container in the fridge for up to 3 days. For the freezer, wrap individual slices in foil and freeze for up to 2 months. To reheat, avoid the microwave - it makes the bread rubbery.
Instead, pop them in a toaster oven or air fryer at 350°F (175°C) for 3-5 minutes until the cheese sizzles again.
Zero Waste Ideas: If you have leftover garlic butter, don't toss it! Brush it on roasted carrots or toss it with sautéed spinach. If you have the crusty ends of the baguette that were too small to cheese, toss them in the garlic butter and bake them for 5 minutes to make instant garlic croutons for a salad.
Great Side Dish Pairings
This dish is a versatile side. Because it's so rich, it works best with something acidic or protein heavy.
For a cozy dinner, I love serving this alongside fried potatoes and sausage for a total comfort food feast. The saltiness of the sausage complements the garlic and butter beautifully.
If you want something lighter, a crisp Caesar salad or a bowl of tomato basil soup is the classic route. The acidity of the tomatoes cuts right through the velvetiness of the mozzarella, making the whole meal feel balanced.
Whether you're serving it as a starter or a side, this cheesy garlic bread is always the first thing to disappear from the table.
Recipe FAQs
How to do cheesy garlic bread?
Preheat your oven to 400°F. Spread a mixture of melted butter, garlic, parsley, and salt on a halved baguette, top with mozzarella and Parmesan, and bake for 10 12 minutes.
What bread is used for cheesy garlic bread?
A French baguette is the best choice. Its structure supports the heavy cheese and garlic butter without becoming soggy.
How to melt cheese on garlic bread?
Bake the assembled bread at 400°F for 10 12 minutes. For a shatteringly crisp finish, toggle the broiler for the final 60 seconds.
How to prepare garlic bread cheese?
Combine shredded mozzarella and grated Parmesan. Spread these directly over the garlic butter emulsion before placing the bread in the oven.
Can I store leftovers in the refrigerator?
Yes, keep them in an airtight container. Sliced pieces will remain fresh for up to 3 days.
Is it true that I must toast the bread before adding cheese to prevent sogginess?
No, this is a common misconception. Baking the butter and cheese together at 400°F for 10 12 minutes creates a perfect crust while melting the cheese.
How to reheat leftover cheesy garlic bread?
Use a toaster oven or air fryer at 350°F. Heat for 3 5 minutes until the cheese sizzles, as microwaves make the bread rubbery.
Cheesy Garlic Bread