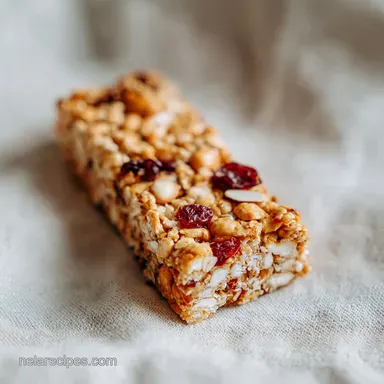
Healthy Homemade Granola Bars for Kids
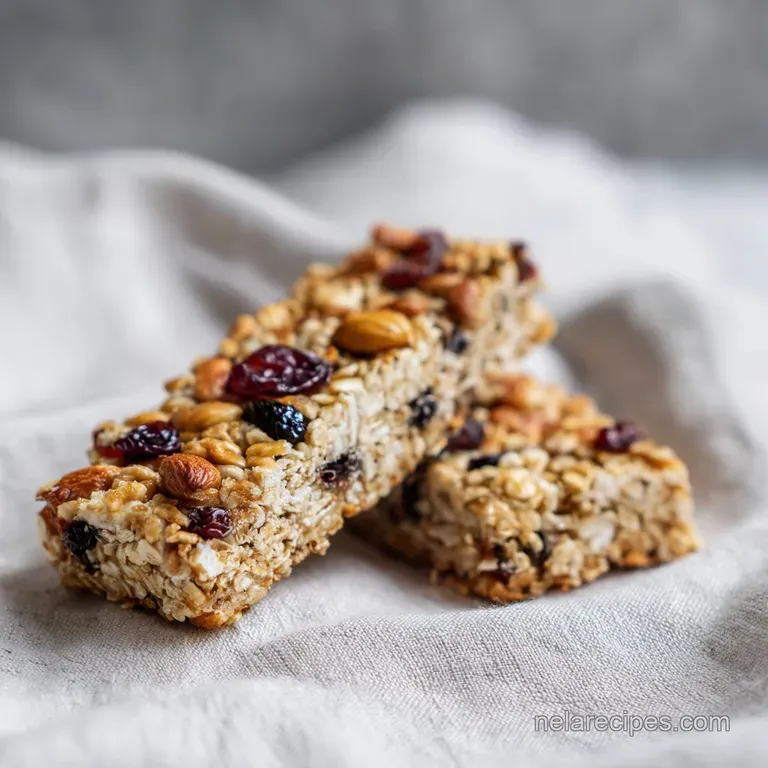
This recipe transforms humble pantry staples into chewy, snack master approved treats that actually survive the lunchbox commute without turning into a pile of crumbs. By using a specific toasting technique and heavy compression, we achieve that elusive "store-bought" structural integrity using only wholesome, budget-friendly ingredients.
- Time:10 minutes active + 20 minutes cook + 2 hours chilling = 150 minutes total
- Flavor/Texture Hook: Toasty, honey sweetened, and velvety chocolate finish
- Perfect for: School lunchboxes, toddler snacks, and budget conscious meal prepping
Make-ahead: Prepare the full batch up to 1 week in advance for grab-and-go ease.
- Making Healthy Homemade Granola Bars for Kids
- Why the Toasting Step Matters
- Deep Dive Into Essential Ingredients
- Ingredients and Smart Substitutes
- Essential Gear for Snack Masters
- Bringing Your Snack Creation Together
- Troubleshooting Your Snack Bar Texture
- Customizing Your Healthy Snack Batch
- Storing and Freezing Your Bars
- Fun Ways to Serve Snacks
- Myths About Homemade Snacks
- Recipe FAQs
- 📝 Recipe Card
Making Healthy Homemade Granola Bars for Kids
The air in my kitchen currently smells like a toasted oat heaven, mixed with that deep, caramel like aroma of warm honey and sunflower butter. If you’ve ever opened a lunchbox only to find a sad heap of loose oats where a granola bar used to be, you know the frustration.
I used to think I was failing at "basic snack prep" until I realized most recipes skip the two most important steps for structural integrity: toasting and the "big squeeze."
Getting these healthy homemade granola bars for kids right means we aren't just mixing things in a bowl; we are building a snack that can withstand a backpack jostle. My kids used to call my early attempts "granola cereal" because they crumbled instantly.
But once I started treating the binder like a glue and the oats like building blocks, everything changed. We’re talking about a chewy, soft baked texture that feels like a treat but packs enough fiber to keep them fueled until dinner.
The beauty of this recipe is that it’s completely nut free, making it the ultimate homemade granola bars for school solution. We use sunflower seed butter, which gives that rich, creamy vibe without the allergy risks.
Plus, by making them ourselves, we skip the weird preservatives and high fructose corn syrup found in the blue box versions. It’s budget friendly, kid approved, and honestly, I find myself "quality testing" about three of them before they even hit the fridge.
Why the Toasting Step Matters
Moisture Barrier: Toasting the oats dries out their surface, preventing them from absorbing too much liquid and becoming a soggy, mushy mess.
Flavor Depth: Brief exposure to heat creates a nutty profile that balances the sweetness of the raw honey and vanilla.
Structural Integrity: Warm oats bond more effectively with the liquid binder, creating a tighter "matrix" once the bars are pressed and chilled.
Emulsification Stability: Melting the coconut oil and honey together ensures the fat and sugar stay combined, preventing oily spots in the finished bars.
| Method | Total Time | Texture | Best For |
|---|---|---|---|
| This Soft Baked | 150 minutes | Chewy and firm | Lunchboxes & Travel |
| No Bake Style | 45 minutes | Soft and tacky | Immediate snacking |
| Crunchy Style | 60 minutes | Brittle and crisp | Dipping in milk |
Choosing the right method depends on how you plan to eat them, but for the most durable results, this soft baked version is the clear winner for parents. If you are looking for more quick snacks, you might want to try these No Bake Energy Bites for those days when you don't want to turn on the oven at all.
Deep Dive Into Essential Ingredients
| Ingredient | Science Role | Pro Secret |
|---|---|---|
| Rolled Oats | Primary structural base | Use "Old Fashioned" for a better chew than "Quick" oats. |
| Raw Honey | Viscous liquid binder | Its high sugar content acts as the "glue" when heated. |
| Ground Flaxseed | Nutritional binder | Creates a "flax egg" effect when it hits the liquid. |
| Sunflower Butter | Fat and emulsifier | Provides creaminess while keeping the recipe school safe. |
When selecting your oats, stick to the 230g of old-fashioned rolled oats. They have enough surface area to grab onto the honey and oil. Avoid using quick cook oats here; they tend to dissolve into a paste like texture that kids find a bit "mushy."
Ingredients and Smart Substitutes
- 2.5 cups (230g) old fashioned rolled oats: Why this? Provides the chewy, hearty structure that defines a classic granola bar.
- Substitute: Quinoa flakes (Equal weight). Results in a thinner, more protein dense bar.
- 0.5 cup (50g) ground flaxseed: Why this? Adds Omega-3s and helps bind the oats together effectively.
- Substitute: Chia seeds. Note: This adds a slight crunch and "popping" texture.
- 1 tsp ground cinnamon: Why this? Naturally enhances the sweetness without adding extra sugar.
- Substitute: Pumpkin pie spice for a seasonal, warm flavor profile.
- 0.5 tsp fine sea salt: Why this? Balances the honey and brings out the chocolate notes.
- Substitute: Himalayan pink salt for a milder salty finish.
- 0.5 cup (120g) creamy sunflower seed butter: Why this? Keeps the recipe nut free and provides essential healthy fats.
- Substitute: Creamy peanut butter (if allergies aren't a concern). Adds a classic nutty flavor.
- 0.5 cup (170g) raw honey: Why this? The primary adhesive that keeps the bars from crumbling.
- Substitute: Brown rice syrup. Note: This is even stickier but slightly less sweet than honey.
- 0.25 cup (55g) unrefined coconut oil: Why this? Solidifies at room temperature, helping the bars set firmly.
- Substitute: Unsalted butter. Note: Adds a dairy rich flavor but stays softer at room temp.
- 1 tsp vanilla extract: Why this? Provides that "homemade cookie" aroma that kids love.
- Substitute: Almond extract. Use only 1/4 tsp as it is much stronger.
- 0.5 cup (85g) mini dark chocolate chips: Why this? Minis distribute better, ensuring chocolate in every single bite.
- Substitute: Cacao nibs for a less sweet, crunchier alternative.
- 0.25 cup (30g) shredded unsweetened coconut: Why this? Adds texture and a subtle tropical sweetness without extra sugar.
- Substitute: Finely chopped sunflower seeds for extra crunch.
Essential Gear for Snack Masters
You don't need a professional bakery setup for these healthy homemade granola bars for kids, but a few specific tools make the process much smoother. An 8x8-inch square pan is non negotiable for the right thickness. If you use a larger pan, the bars will be too thin and break easily.
Parchment paper is your best friend here. Don't just line the bottom; leave an "overhang" or "wings" on the sides so you can lift the entire block of bars out once they've chilled. This prevents you from having to dig them out with a knife, which usually ends in a crumbly disaster.
Finally,, find a flat bottomed glass or a heavy measuring cup. You need something to apply serious pressure when packing the mixture into the pan.
Bringing Your Snack Creation Together

- Preheat and toast. Set your oven to 350°F (175°C). Spread 230g of rolled oats on a baking sheet and toast for 8-10 minutes until lightly golden and fragrant. Note: This prevents the oats from becoming soggy later.
- Mix the dry base. In a large mixing bowl, whisk together the toasted oats, 50g ground flaxseed, 1 tsp cinnamon, and 0.5 tsp sea salt.
- Melt the binder. In a small saucepan over low heat, combine 120g sunflower butter, 170g raw honey, and 55g coconut oil. Stir until completely melted and smooth.
- Flavor the liquid. Remove the saucepan from the heat and stir in 1 tsp vanilla extract.
- Combine and coat. Pour the warm liquid binder over the dry oat mixture. Stir until every oat is thoroughly coated in the glossy mixture.
- Cool slightly. Allow the mixture to cool for 5 minutes. Fold in 85g mini chocolate chips and 30g shredded coconut. Note: Cooling prevents the chips from melting completely into a brown smudge.
- Prep the pan. Line an 8x8-inch square pan with parchment paper, ensuring there is an overhang on the sides.
- The Big Squeeze. Transfer the mixture to the pan. Use a flat bottomed glass to press down with heavy physical pressure until the surface is flat and compacted.
- The final bake. Bake at 325°F (160°C) for 20 minutes. The bars will look soft but will set firmly as they cool.
- Chill and slice. Let the bars cool to room temperature, then refrigerate for at least 2 hours. Use the parchment "wings" to lift and slice into 14 bars.
Troubleshooting Your Snack Bar Texture
Why Do Bars Crumble?
The most common culprit is a lack of compression. If the oats aren't smashed together while warm, air pockets remain, and the "glue" can't do its job. Another reason could be skipping the 2 hour fridge rest. The coconut oil and honey need that cold environment to solidify back into a solid binder.
Why Are Bars Sticky?
If your bars feel tacky or leave a residue on your fingers, the honey to oat ratio might be slightly off, or they haven't chilled long enough. Ensure you measured 170g of honey precisely. Over measuring the liquid ingredients will result in a bar that never truly sets.
| Problem | Root Cause | Solution |
|---|---|---|
| Falling Apart | Weak compression | Press harder with a flat bottomed glass next time. |
| Oily Texture | Oil separation | Whisk the liquid binder more thoroughly before pouring. |
| Too Hard | Overbaking | Reduce oven time by 3 minutes; they should look soft when pulled out. |
Common Mistakes Checklist
- ✓ Never skip the oat toasting (it prevents the "cardboard" taste).
- ✓ Use the parchment paper overhang for easy removal.
- ✓ Press the mixture with more force than you think is necessary.
- ✓ Allow the full 2 hour chill time before attempting to slice.
- ✓ Use mini chocolate chips to ensure even distribution and better binding.
Customizing Your Healthy Snack Batch
If you need to make a larger batch for a birthday party or a week long camping trip, scaling is quite simple. To double the recipe (28 bars), use a 9x13-inch baking pan. You will want to keep the spices and salt at about 1.5x the original amount rather than doubling them to avoid an overpowering flavor.
The liquids should be reduced by about 10% when doubling to ensure the bars don't become too soft.
For those looking for gluten free homemade granola bars, simply ensure your rolled oats are certified gluten-free. Oats are naturally gluten-free but are often processed in facilities with wheat. If you’re cutting back on sweeteners, you can make homemade granola bars no sugar by substituting the honey with a mashed overripe banana, though keep in mind the shelf life will be shorter and the texture will be much softer. For more protein heavy options, check out my 2 Ingredient Protein Bread which also works great as a snack base.
Storing and Freezing Your Bars
Fridge: These bars are best kept in an airtight container in the refrigerator for up to 1 week. Because we use coconut oil and honey as binders, they stay firmest when cold. If they sit out in a warm backpack for several hours, they will soften but shouldn't fall apart.
Freezer: For long term storage, wrap individual bars in parchment paper and place them in a freezer safe bag. They will stay fresh for up to 3 months. You can even eat them straight from the freezer for a chilly, chewy treat!
Zero Waste Tip: If you end up with crumbs at the bottom of the pan (it happens to the best of us!), don't throw them away. Those "oat clusters" make an incredible topping for Greek yogurt or a bowl of morning oatmeal.
Fun Ways to Serve Snacks
While these healthy homemade granola bars for kids are perfect on their own, you can get creative with how you present them. For a "fancy" after school snack, I sometimes drizzle a little extra melted sunflower butter over the top and add a sprinkle of flaky sea salt.
It makes them feel like a gourmet dessert rather than just a healthy bar.
If you have toddlers, try slicing the bars into smaller "granola bites" or squares. This makes them easier for little hands to manage and prevents a half eaten bar from going to waste.
You can also serve them alongside a few slices of apple or a string cheese for a balanced snack that covers all the nutritional bases: healthy fats, fiber, and protein.
Myths About Homemade Snacks
"Honey is just as bad as white sugar." While honey is a sweetener, it contains antioxidants and minerals that refined white sugar lacks. More importantly, in this recipe, honey serves a functional purpose as a structural binder that white sugar cannot replicate without turning the bars into hard candy.
"Homemade bars are always cheaper than store-bought." This depends on where you shop! Buying ingredients like flaxseed and sunflower butter in bulk is the key to making these budget friendly.
If you buy small, specialty jars every time, the cost per bar might equal the store-bought versions, but the quality of your homemade granola bars for kids will always be superior.
"You don't need to bake them if the ingredients are 'clean'." The 20 minute bake at 325°F (160°C) isn't about food safety; it's about "setting" the honey and flaxseed.
This brief heat application creates a semi permanent bond that prevents the bars from turning into a sticky puddle at room temperature.
Recipe FAQs
What is a healthy granola bar for kids?
A healthy bar relies on whole food binders like honey and sunflower seed butter. These bars provide sustained energy through fiber rich oats and healthy fats, avoiding the refined sugars found in store-bought options.
Is homemade granola bar healthy?
Yes, homemade versions offer complete control over ingredients. By using rolled oats, flaxseed, and raw honey, you eliminate preservatives while maintaining high nutritional density for your children.
What is the best snack bar for diabetics?
Focus on bars with high fiber and healthy fats to slow glucose absorption. While this recipe contains honey, the inclusion of ground flaxseed and sunflower seed butter helps balance the overall glycemic impact compared to processed alternatives.
Are granola bars good for children?
Yes, they serve as an excellent portable fuel source for active kids. Using ingredients like dark chocolate chips and shredded coconut makes them appealing to children while ensuring they get quality nutrients.
Why did my bars crumble instead of holding together?
Insufficient physical pressure during assembly is usually the culprit. You must use a flat bottomed glass to press the mixture firmly into the pan to eliminate air pockets, similar to the precision needed for a quick skillet meal where even heat distribution and structure are key.
How to ensure the chocolate chips do not melt while mixing?
Wait exactly 5 minutes after adding the warm binder before folding in the chips. Allowing the oat mixture to cool sufficiently prevents the heat from turning your mini chips into streaks of chocolate.
How to store bars to maintain their texture?
Keep them in an airtight container inside the refrigerator. Because the binders are based on coconut oil and honey, cold temperatures are required to keep the bars firm and prevent them from softening at room temperature.
Healthy Homemade Granola Bars