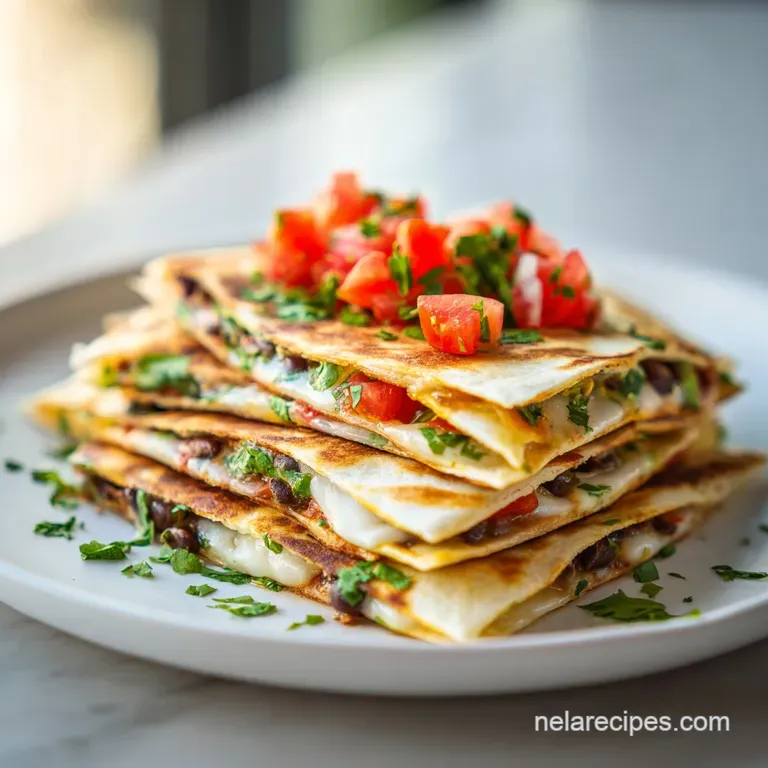
Black Bean Quesadillas: Crispy and Velvety
- Time:5 minutes prep + 10 minutes cook = 15 minutes total
- Flavor/Texture Hook: Smoldering cumin heat meets a crispy, golden brown crunch
- Perfect for: Stress free weeknight dinners or healthy vegetarian lunch recipes
- The Secret to Golden Textures
- Official Recipe Measurements and Stats
- Selecting Wholesome Ingredients and Spices
- Minimal Tools for Maximum Flavor
- Master the Simple Cooking Process
- Solving Common Kitchen Prep Mistakes
- Fun Ways to Mix Flavors
- Storing and Saving Your Leftovers
- Presentation and Final Serving Tips
- CRITICAL Sodium Alert!
- Recipe FAQs
- 📝 Recipe Card
The first time I really understood the soul of a quesadilla wasn't in a restaurant, but in a small, humid kitchen in Oaxaca. A woman named Elena was slapping fresh masa onto a hot comal, and the scent toasty, corn forward, and slightly smoky filled the air.
She didn't use a mountain of fancy ingredients. It was just beans, a pinch of herbs, and local cheese that pulled apart like silk. When that first bubble formed on the tortilla and the cheese started to hiss against the heat, I realized that Black Bean Quesadillas aren't just "fast food"; they’re a vessel for whatever flavor profile you’re craving.
Since that trip, I’ve made these roughly a thousand times for my own family. I’ve realized that while the traditional Mexican versions are unmatched, we can recreate that same comforting, wholesome vibe in about 15 minutes using what’s in our pantry.
We’re going for a texture that is legitimately loud when you bite into it. No one wants a sad, floppy tortilla. We want that golden, oil kissed exterior that holds its shape even when loaded with hearty beans.
Whether you are looking for quick meatless dinner ideas or you just need to feed a crowd of hungry kids after soccer practice, this is the blueprint. It’s a meal that feels like a hug, especially when you pair it with a bright, zesty salsa.
We’re focusing on simple black bean quesadillas today because sometimes the most straightforward recipes are the ones we return to week after week. Let’s get that skillet hot and jump into the details.
The Secret to Golden Textures
When we talk about what makes these work, it really comes down to how we handle the filling and the heat. Most people just toss whole beans into a tortilla, but that’s why the filling always tumbles out onto your plate.
By crushing a portion of the beans, we release natural starches that act as a binder, holding the cumin and garlic right where they belong. It creates a creamy, velvety contrast against the brittle, toasted shell.
- Starch Activation: Mashing one third of the beans creates a thick paste that anchors the whole beans and salsa together during flipping.
- Maillard Enhancement: The small amount of neutral oil in the pan reacts with the flour in the tortilla to create that characteristic brown spotting and nutty aroma.
- Moisture Control: Using chunky salsa instead of watery hot sauce prevents the tortilla from steaming from the inside out, which would otherwise cause sagginess.
- Protein Denaturation: The Monterey Jack cheese proteins melt at a specific low point, ensuring the "glue" sets before the tortilla burns.
| Method | Time | Texture | Best For |
|---|---|---|---|
| Stovetop Skillet | 10 minutes | Maximum crispness, charred spots | Authentic, quick flavor |
| Oven Sheet Pan | 15 minutes | Evenly toasted, slightly drier | Feeding a large family |
| Air Fryer | 8 minutes | Extra crunchy, very bubbly | Individual servings |
Choosing the right method depends on how many people you are feeding. If I'm just making a quick vegetarian black bean quesadilla for myself, the skillet is my best friend. But if the whole neighborhood is over, I’ll slide two sheet pans into the oven at 400°F (200°C) and let the dry heat do the work.
The stovetop is superior for flavor, though, because you get those little pockets of oil that fry the flour into a flaky crust.
Official Recipe Measurements and Stats
To get this right every single time, you need to stick to the ratios. If you add too much salsa, you’ll end up with a soggy mess. Too little cheese, and the "glue" won't hold. We use standard 15 oz cans for the beans, which are perfectly sized for a batch of eight tortillas.
This provides a substantial meal for four people, or a very generous snack for a larger group.
| Ingredient | Science Role | Pro Secret |
|---|---|---|
| Black Beans | Fiber rich structural base | Rinse thoroughly to remove metallic tin taste |
| Monterey Jack | High moisture melting agent | Grate your own for a smoother, gooier melt |
| Lime Juice | Acidic brightness | Adds a "zing" that cuts through the heavy starch |
| Ground Cumin | Earthy aromatic | Toast it in a dry pan for 30 seconds for deeper flavor |
Rinsing the beans is one step most people skip, but it’s vital. That liquid in the can is full of excess sodium and starches that can make the filling feel "muddy." Once they are clean and dry, they take on the flavors of the cumin and garlic powder much more effectively. If you're looking for another comforting meal that uses simple pantry staples, you might also love this creamy corn chowder, which pairs beautifully with these bean quesadillas.
Selecting Wholesome Ingredients and Spices
For these vegetarian black bean quesadillas, every component should be high quality. Look for flour tortillas that feel soft and pliable; if they are stiff in the package, they are likely dry and will crack when you try to fold them.
If you prefer corn tortillas, just know they require a bit more oil and a longer cook time to reach that same level of flexibility without breaking.
- 2 cans (15 oz each) black beans: Rinsed and drained well. Why this? They provide a meaty texture without the actual meat.
- 0.5 cup chunky salsa: Use your favorite heat level. Why this? Provides moisture and built in seasoning from tomatoes and onions.
- 1 tsp ground cumin: The backbone of Mexican inspired flavor.
- 0.5 tsp garlic powder: Easier to distribute evenly than fresh minced garlic in a quick mash.
- 1 tbsp fresh lime juice: Brightens the heavy beans.
- 0.25 cup fresh cilantro: Chopped finely. Why this? Adds a necessary herbal freshness to the finish.
- 8 medium flour tortillas: The standard "soft taco" size works best.
- 2 cups shredded Monterey Jack cheese: Or a Mexican blend. Why this? It has a superior melt point compared to sharp cheddar.
- 1 tbsp neutral oil: Grapeseed or canola works great.
If you don't have Monterey Jack, you can swap it for a mild white cheddar or even Mozzarella in a pinch. However, Monterey Jack is the gold standard here because it gets incredibly gooey without becoming oily. For the beans, if you're out of black beans, pinto beans are a fantastic substitute.
They are slightly creamier when mashed and offer a very similar nutritional profile.
| Original Ingredient | Substitute | Why It Works |
|---|---|---|
| Flour Tortillas | Corn Tortillas | gluten-free and more traditional. Note: Harder to fold without breaking. |
| Monterey Jack | Pepper Jack | Adds a spicy kick. Note: Use half and half if you're sensitive to heat. |
| Chunky Salsa | Ro Tel Tomatoes | Similar acidity and texture. Note: Drain the liquid first to avoid sogginess. |
Minimal Tools for Maximum Flavor
One thing I love about this easy black bean quesadilla recipe is that it doesn't require a kitchen full of gadgets. You really only need one bowl and one pan. This makes it one of my favorite quick meatless dinner ideas for those nights when the dishwasher is already full and I just can't face more scrubbing.
A simple potato masher is the best tool for the beans, but a large fork works just as well if you're in a minimalist kitchen.
You’ll also want a large, flat skillet. Cast iron is fantastic because it holds heat so evenly, but a reliable non stick pan is often easier for beginners because it allows the quesadilla to slide around without catching. If you have a griddle that spans two burners, use it!
You can cook four quesadillas at once and have the whole family eating in under ten minutes.
Chef's Tip: To get a restaurant style finish, use a heavy weight (like another smaller skillet or a bacon press) to push the quesadilla down while it cooks. This ensures every square inch of the tortilla makes contact with the hot oil.
Master the Simple Cooking Process
Now, let's get into the actual cooking. The key here is patience during the first two minutes. You want to hear a gentle sizzle, not a violent pop. If the oil starts smoking, pull the pan off the heat immediately.
We’re looking for a controlled toast that lets the heat penetrate through to the center to melt the cheese before the outside turns black.
- In a medium bowl, combine the rinsed black beans, salsa, cumin, garlic powder, and lime juice.
- Use a potato masher or large fork to crush roughly one third of the beans. Note: This creates the "paste" that holds everything together.
- Stir in the chopped cilantro until the mixture is uniform.
- Lay out the eight tortillas on a clean counter.
- Distribute the bean mixture evenly across one half of each tortilla, leaving a small border at the edge.
- Top the beans with a generous layer of shredded cheese and fold the empty half over into a half moon.
- Heat a large skillet over medium heat with a small amount of oil.
- Place the quesadillas in the pan and press down lightly with a spatula.
- Cook for 2–3 minutes per side until the exterior is golden brown and crackling.
- If the cheese isn't fully melted after flipping, cover the pan with a lid for 60 seconds.
- Remove from heat and let rest for 1 minute before slicing into wedges.
This resting period in step 11 is non negotiable! If you cut into it immediately, the molten cheese will flow right out like a lava lamp. Giving it sixty seconds allows the cheese to "set" slightly, ensuring your wedges stay neat and tidy. Since these are such a family favorite, I often make a double batch. If you’re looking for a sweet treat to serve after these savory wedges, check out these 3 ingredient peanut butter cookies for a simple dessert that stays within the theme of minimal effort.
Solving Common Kitchen Prep Mistakes
Even a simple recipe can have its pitfalls. The most common issue I hear about is the "soggy bottom." This usually happens when people use too much oil or don't preheat the pan enough. If the oil isn't hot when the tortilla hits it, the bread will just soak up the fat like a sponge instead of searing.
Why Your Tortilla Stays Soft
If your quesadilla comes out greasy rather than crispy, you likely didn't have enough heat. The tortilla needs an immediate "thermal shock" to crisp up the outer layer of starch. Also, make sure you aren't using a lid for the entire cooking process.
Only use the lid at the very end to help the cheese melt; if you keep it on the whole time, the steam will ruin the texture.
Why the Filling Falls Out
This is almost always due to skipping the mashing step. Whole beans are spherical and will naturally roll out of the folded tortilla. By creating that bean paste, you create a sticky matrix that grips the other beans and the cheese. Think of it like mortar between bricks.
| Problem | Root Cause | Solution |
|---|---|---|
| Tortilla burns before cheese melts | Heat is too high | Lower heat to medium and use a lid for 1 minute. |
| Filling is bland | Not enough salt/acid | Add an extra squeeze of lime or a pinch of kosher salt. |
| Tortilla cracks when folding | Tortillas are cold or dry | Microwave them for 10 seconds under a damp paper towel first. |
Common Mistakes Checklist
- ✓ Always pat the beans dry after rinsing to prevent a watery filling.
- ✓ Grate your cheese fresh; pre shredded cheese is coated in potato starch that prevents a perfect melt.
- ✓ Don't overcrowd the pan if the quesadillas touch, they will steam each other.
- ✓ Use a "neutral" oil like avocado or canola; olive oil has a low smoke point and can taste bitter when fried.
- ✓ Spread the filling all the way to the fold, but leave a half inch at the rounded edge.
Fun Ways to Mix Flavors
While this vegetarian bean and cheese quesadilla is perfect as is, it's also a blank canvas. I love to raid the fridge for "odds and ends" to bulk these up. My favorite addition is a handful of frozen sweet corn or some finely diced bell peppers.
It adds a crunch and a sweetness that balances the earthy cumin perfectly.
If you're making these for a party, consider a "topping bar." Put out small bowls of sour cream, pickled jalapeños, and extra cilantro. It makes the meal feel more interactive and allows everyone to customize their heat levels. For another great appetizer option that works well alongside these, you should try my brown sugar kielbasa bites — the sweet and savory contrast is always a hit at gatherings.
- Scaling Down (1-2 people): Simply cut the ingredients in half. Use one can of beans and 4 tortillas. The cook time remains exactly the same.
- Scaling Up (8-12 people): Increase the beans and cheese linearly, but only increase the cumin and garlic powder to 1.5x the original amount. Spices can become overpowering in large volumes. Work in batches or use the oven method mentioned earlier.
Storing and Saving Your Leftovers
Leftover quesadillas are a gift to your future self. They hold up surprisingly well in the fridge for up to 3 or 4 days. The trick is to store them in an airtight container with a piece of parchment paper between the layers. This prevents them from sticking together as the cheese cools.
For long term storage, you can actually freeze these! Assemble them completely but do not cook them. Wrap each individual quesadilla in plastic wrap and then store them in a freezer bag for up to 2 months.
When you're ready to eat, you can cook them straight from frozen in a skillet over low medium heat. Just add a couple of extra minutes to the cook time to ensure the center gets hot.
To reheat cooked leftovers, please stay away from the microwave. It will turn the tortilla into rubber. Instead, pop them back into a dry skillet or a toaster oven for 3-4 minutes. This will bring back that "shatter crisp" texture that made them so good in the first place.
Regarding zero waste, if you have leftover bean filling but no tortillas, it makes a fantastic dip for chips or a protein rich base for a breakfast bowl with a fried egg on top.
Presentation and Final Serving Tips
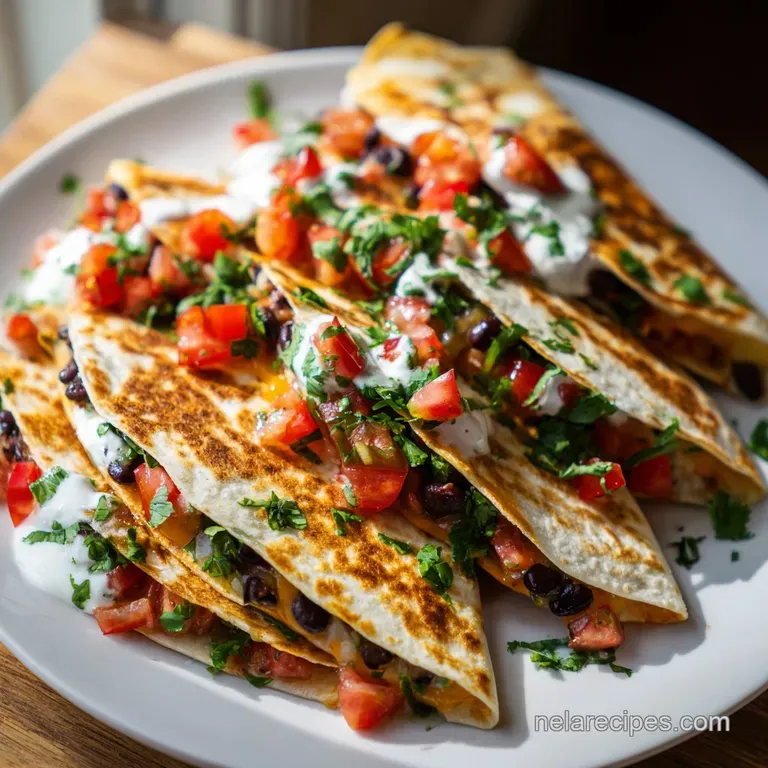
We eat with our eyes first, so don't just dump these on a plate! Slice the half moons into three neat wedges. This creates those iconic triangular shapes that are easy to pick up and dip. I like to arrange them in a fan shape on a wooden board for a rustic, communal feel.
A drizzle of "crema" (sour cream thinned with a little lime juice) across the top adds a professional touch that takes seconds. Sprinkle some extra fresh cilantro and a few slices of radish for color.
The pink and green against the golden brown tortilla makes the dish look much more sophisticated than a 15 minute meal has any right to be.
- Myth 1: "You need a lot of oil for crispy tortillas." Actually, too much oil makes them heavy. A thin, even coating is all you need for that golden glow.
- Myth 2: "Canned beans aren't as healthy as dried." While dried beans are great, USDA data shows that canned beans retain almost all their fiber and protein. Just watch the sodium by rinsing them!
- Myth 3: "Quesadillas must be flipped perfectly or they are ruined." If your filling spills out during the flip, just tuck it back in with your spatula. No one will ever know once it's sliced!
Ultimately, these black bean quesadillas are about the joy of a quick, hot meal that doesn't demand hours of your time. They are humble, reliable, and incredibly satisfying. Whether you're a seasoned cook or just starting out, this is a recipe that will never let you down.
Right then, let's get cooking I promise your kitchen is about to smell incredible!
CRITICAL Sodium Alert!
1190 mg 1190 mg (52% 52%)
The American Heart Association recommends limiting sodium intake to less than 2,300 mg per day, with an ideal limit of less than 1,500 mg for most adults.
Personalized Tips to Dramatically Reduce Sodium:
-
Choose Low-Sodium Canned Beans-20%
Switch to low-sodium or no-salt added canned black beans. Rinsing drained canned beans helps remove some, but starting with low-sodium varieties is key.
-
Opt for Lower Sodium Cheese-15%
Select reduced sodium Monterey Jack cheese or use a smaller portion of regular cheese to significantly lower the sodium content.
-
Make Your Own Chunky Salsa-20%
Homemade chunky salsa allows you to control sodium. Blend fresh tomatoes, onions, peppers, and cilantro, adding no added salt. You can also use 'no salt added' canned tomatoes if needed.
-
Boost Flavor with Herbs & Spices
Continue using aromatic ingredients like cumin, garlic powder, fresh lime juice, and cilantro. These naturally enhance flavor without adding sodium.
-
Eliminate Added Salt
This recipe does not explicitly call for added salt, but ensure no extra salt is added during preparation or as a garnish. Flavor with other ingredients.
Recipe FAQs
Why is it necessary to crush one-third of the black beans?
Crushing the beans creates a binding paste that holds the filling together. This prevents the ingredients from falling out of the tortilla when you flip or slice your quesadillas.
Is it true that I should cook these at a high heat setting to get them crispy?
No, this is a common misconception. You should cook them over medium heat to ensure the cheese melts evenly before the flour tortillas burn.
How to ensure the cheese is perfectly melted?
Cover the pan with a lid for 60 seconds after flipping if the cheese remains unmelted. This traps the heat inside, gently softening the cheese without over browning the tortilla exterior.
Can I store cooked quesadillas for later?
Yes, they keep well in the refrigerator for 3 to 4 days. Place them in an airtight container with parchment paper between layers to stop them from sticking together as they cool.
Is it possible to freeze these for a quick meal later?
Yes, you can freeze them for up to 2 months. Assemble the quesadillas but do not cook them; wrap each in plastic wrap and store them in a freezer bag until you are ready to heat them in a skillet.
How to prevent the quesadillas from getting soggy?
Ensure you rinse and drain the black beans thoroughly before mixing. Excess moisture from the can can make the tortillas limp, so give them a good shake in the colander first.
Why is there a one-minute rest period after cooking?
Resting allows the cheese to set slightly so the filling stays in place while you slice. This brief pause prevents the melted Monterey Jack from oozing out immediately when you cut through the tortillas.
Crispy Black Bean Quesadillas

