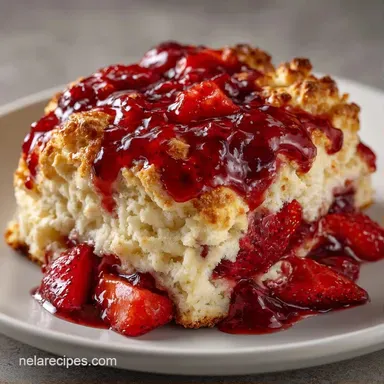
Old Fashioned Strawberry Cobbler: Golden and Fluffy
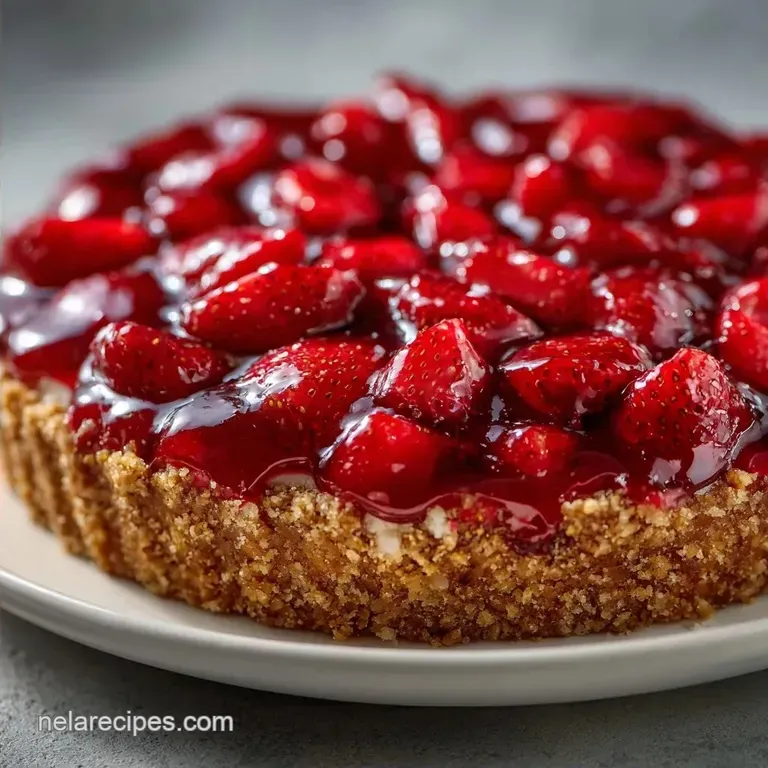
- Time:15 minutes active + 35 minutes baking
- Flavor/Texture Hook: Mahogany gold top with a jammy, tart center
- Perfect for: Summer potlucks, family Sundays, or any sweet tooth craving
That sound of a bubbling pan in a hot oven is basically my favorite song. I remember this one humid July afternoon when my kitchen felt like a sauna and I had three pounds of berries that were about to turn.
I didn't want to spend hours on a fancy tart, so I just tossed everything together in a 9x9 dish, hoping for the best.
When I pulled it out, the edges were sizzling and the smell of caramelized sugar and warm berries hit me like a wave. It wasn't some polished pastry shop creation, just a rustic, gooey mess that my family absolutely inhaled. That's when I realized the charm is in the imperfection.
You can expect a dessert that feels like a hug. This Strawberry Cobbler isn't about precision or fancy piping; it's about that contrast between the tart, juicy berries and a tender, cake like topping. Trust me on this, it's the kind of dish that makes people linger at the table.
Strawberry Cobbler
Right then, let's talk about why this actually works. Most people just throw fruit in a pan, but there's a reason we do things in a specific order here.
The Juice Bind: Cornstarch acts as a stabilizer, thickening the natural liquids from the fruit. According to Serious Eats, using a starch prevents the filling from becoming too watery during the bake.
The Lift: Baking powder creates tiny air pockets in the batter, which prevents the topping from becoming a dense brick.
The Fat Integration: Melted butter provides a rich, velvety mouthfeel and helps the edges brown into that deep gold color.
The Acid Balance: Lemon juice cuts through the sugar, making the berry flavor pop rather than just tasting like syrup.
Depending on your mood or what's in the pantry, you might choose different paths for your dessert. Here's a quick way to decide which route to take today.
| Method | Time | Texture | Best For |
|---|---|---|---|
| Fresh Berries | 55 mins | Jammy & Bright | Peak Summer/Guests |
| Frozen Berries | 65 mins | Softer & Syrupy | Winter Cravings |
| Pre made Mix | 40 mins | Uniform & Cakey | Extreme Time Crunch |
It's also helpful to understand how the core components behave under heat so you can tweak things without ruining the batch.
Component Analysis
| Ingredient | Science Role | Pro Secret |
|---|---|---|
| Cornstarch | Thickening Agent | Toss with sugar first to avoid clumps |
| Baking Powder | Leavening | Ensure it's fresh for a better rise |
| Melted Butter | Flavor/Browning | Cool it slightly so it doesn't cook the milk |
| Lemon Juice | pH Balancer | Use fresh juice for a sharper zing |
Gathering Your Essentials
For the fruit base, we need 4 cups (600g) of fresh strawberries. Make sure you hull and slice them into thick pieces, about 3-4 per berry. You'll need ½ cup (100g) of granulated sugar, 1 tbsp (15ml) of lemon juice, and 1 tbsp (8g) of cornstarch.
Why this? Fresh berries offer a brightness that frozen ones just can't match.
For the batter, grab 1 cup (125g) of all purpose flour. I usually stick with King Arthur Flour for consistency in my bakes. You'll also need ¾ cup (150g) of granulated sugar, 2 tsp (10g) of baking powder, and ½ tsp (3g) of salt. For the liquids, use ¾ cup (180ml) of whole milk and ½ cup (115g) of unsalted butter, melted and slightly cooled.
Why this? Whole milk adds the necessary fat for a tender crumb.
Right, let's look at some swaps if you're missing something.
| Original Ingredient | Substitute | Why It Works |
|---|---|---|
| Whole Milk | Buttermilk | More tang and a softer rise. Note: Adds a slight sour note |
| Unsalted Butter | Coconut Oil | Similar fat content. Note: Adds a coconut aroma |
| Granulated Sugar | Maple Syrup | Deep, woody sweetness. Note: Increases moisture, may need more bake time |
Before we start, make sure your butter isn't boiling hot. If it's too hot, it can cause the batter to separate or cook the milk proteins prematurely.
Equipment Needed
You don't need a professional kitchen for this, but a few specific tools make it easier. A 9x9 inch baking dish is the gold standard here. If you use a larger pan, the berries will spread too thin and the topping won't have that cozy, nestled feel.
You'll also want two mixing bowls - one for the fruit and one for the batter. A whisk is essential for getting those lumps out of the flour, and a rubber spatula is your best friend for spreading the batter without disturbing the fruit underneath.
Step-by-step Instructions
Let's crack on. Preheat your oven to 350°F (175°C).
- Wash, hull, and slice your strawberries into 3-4 thick pieces per berry.
- In a mixing bowl, toss the berries with the ½ cup sugar, lemon juice, and cornstarch. Note: This creates the syrup base.
- Let the berries sit for 5 minutes until they look glossy and juicy.
- Pour the strawberry mixture into the bottom of your 9x9 inch baking dish.
- In a separate mixing bowl, whisk together the flour, ¾ cup sugar, baking powder, and salt.
- Stir in the milk until just combined, then fold in the melted butter until the batter is smooth and pourable. Note: Don't overmix or the top will be tough.
- Carefully pour the batter over the strawberries.
- Spread the batter gently to the edges using a spatula without stirring the fruit into the mix.
- Bake for 30-35 minutes until the edges are bubbling and the top is a deep mahogany gold.
Chef's Tip: Try freezing your butter for 10 minutes before melting it if you want a slightly more structured crumb, though melted is the classic way for this specific texture.
Troubleshooting Guide
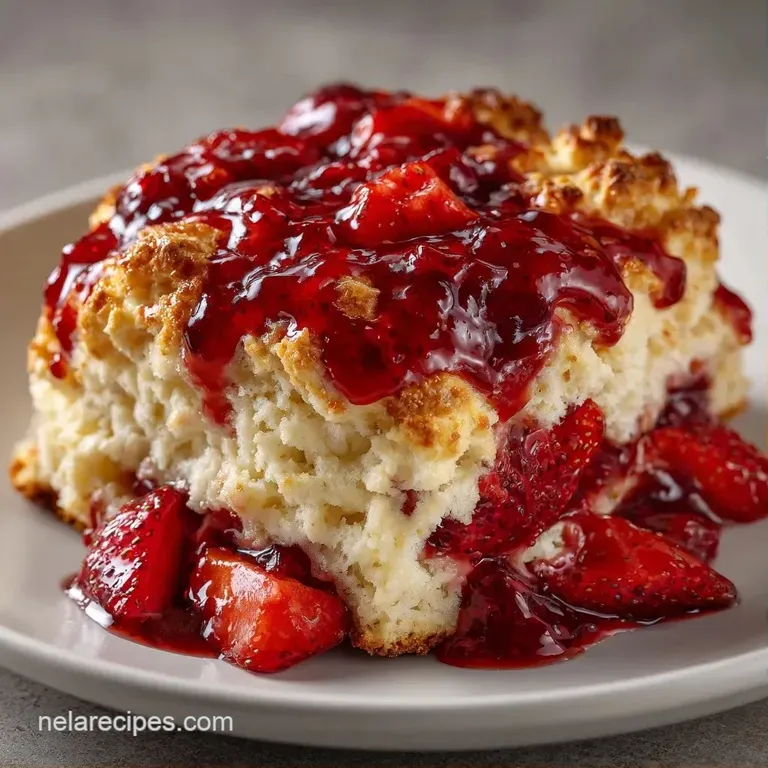
Even the best of us have a "fail" day. If your Strawberry Cobbler didn't turn out quite right, it's usually a simple fix.
| Issue | Solution |
|---|---|
| Why Your Topping Is Gummy | This usually happens if you overmix the batter. When you stir too much, you develop gluten, which turns a tender cake into something more like bread. |
| Why Your Fruit Is Too Runny | If you have a lake of juice at the bottom, the cornstarch might not have had enough time to bond with the berries. Letting the fruit sit for those 5 minutes before baking is a non negotiable step. |
| Why Your Top Burnt Early | Sometimes the sugar in the batter browns faster than the fruit cooks. If you see the top getting too dark at the 20 minute mark, just tent it loosely with foil. |
To make sure you nail it next time, keep this checklist in mind before you pull the dish out of the oven.
- ✓ Edges are bubbling and pulling away slightly from the pan.
- ✓ The center of the batter is set and doesn't jiggle like pudding.
- ✓ The color is a consistent deep gold, not pale yellow.
- ✓ The aroma is sweet and toasted, not just fruity.
Creative Twists and Swaps
Once you've got the basic Strawberry Cobbler down, you can start playing with the flavor profile. If you want something a bit more complex, try adding a pinch of cinnamon or a dash of almond extract to the batter. Almond and strawberry are a match made in heaven.
For a different vibe, you could swap half the strawberries for blueberries or raspberries. If you're feeling fancy, you can check out my Holiday Strawberry Shortcake recipe for a more structured approach to berry desserts.
Boosting the Flavor Profile
Adding a tablespoon of orange zest to the fruit mix gives it a citrusy lift that makes the whole dish feel lighter. Another trick is to sprinkle a bit of coarse turbinado sugar on top of the batter right before it goes in the oven. This creates a shatter like crunch on the surface.
Making it gluten-free
You can use a 1:1 gluten-free flour blend. However, since GF flours absorb liquid differently, I recommend adding an extra tablespoon of milk to ensure the batter stays pourable.
Scaling for Two
If you're just making this for a date night, use a small loaf pan or a 6 inch round cake pan. Halve all the ingredients, but keep the baking powder at about 1.75 tsp to ensure it still rises. Reduce the bake time by about 5-10 minutes.
Wait, I almost forgot the "If you want X, do Y" shortcuts!
- If you want a tangier finish, add an extra teaspoon of lemon juice to the berries.
- If you want a crunchier top, add a sprinkle of brown sugar before baking.
- If you want a "cakey" feel, add 2 tablespoons more flour to the batter.
Common Baking Misconceptions
I've heard a lot of weird advice over the years. Let's set the record straight.
Some people think you need to "blind bake" the crust first. For a cobbler, that's completely wrong. The batter is meant to cook alongside the fruit, absorbing some of those juices to create a soft, velvety interface between the layers.
Another myth is that you should stir the batter into the fruit to "distribute the flavor." Please don't do this. You'll end up with a strawberry cake rather than a cobbler. The goal is two distinct layers that merge only where they touch.
Storage and Zero Waste
This Strawberry Cobbler is best served warm, but it keeps surprisingly well. You can store leftovers in an airtight container in the fridge for up to 4 days. When you're ready for more, just pop a slice in the microwave for 20 seconds or in a toaster oven for 5 minutes to bring back that golden crust.
If you want to freeze it, let it cool completely, then slice into squares and freeze them individually on a tray before bagging them. They'll last for about 2 months. Thaw in the fridge overnight before reheating.
Regarding zero waste, don't throw away those strawberry hulls! You can freeze them in a bag and toss them into a fruit infused water pitcher or even use them in a homemade berry syrup for cocktails.
Serving Suggestions
The most classic way to serve this is with a massive scoop of vanilla bean ice cream. As the ice cream melts into the warm Strawberry Cobbler, it creates a creamy sauce that's just irresistible. If you want something a bit lighter, a dollop of freshly whipped cream with a hint of vanilla does the trick.
For those who love a themed spread, this pairs beautifully with other berry treats. You might want to serve it alongside a July 4th strawberry dessert for a full on berry feast.
If you're serving this at a party, I suggest making it a few hours ahead and keeping it in the pan. It holds its heat well, but if it cools down, a quick 10 minute warm up in the oven at 300°F will make it taste like it was just made.
Honestly, don't even bother with low-fat cream substitutes - this is a dessert, let's lean into the indulgence!
Right then, you've got everything you need. Just remember to be gentle with the batter and let those berries do their thing. Enjoy your Strawberry Cobbler!
Recipe FAQs
How to stop the topping from getting gummy?
Stir the batter until just combined. Overmixing develops gluten, which transforms the tender cake texture into something more like bread.
Why is my strawberry filling too runny?
Let the berries sit with the cornstarch and sugar for 5 minutes before baking. This allows the cornstarch to properly bond with the juices to create a thick syrup.
Can I use frozen strawberries instead of fresh?
No, stick with fresh. Frozen berries release significantly more moisture, which can lead to a watery filling and a soggy bottom crust.
How to store and reheat leftover cobbler?
Store in an airtight container in the fridge for up to 4 days. Reheat a slice in the microwave for 20 seconds or a toaster oven for 5 minutes to restore the golden crust.
Is it true I should stir the batter into the fruit before baking?
No, this is a common misconception. Gently spread the batter over the strawberries to ensure you have a distinct, cake like topping rather than a mixed batter.
How to achieve a mahogany gold crust on the topping?
Bake at 350°F (175°C) for 30 35 minutes. Ensure your oven is fully preheated so the top browns deeply while the edges begin to bubble.
What is a great way to serve this for Mother's Day brunch?
Serve warm with a scoop of vanilla ice cream. This creates a decadent treat similar to a traditional strawberry shortcake but with a cozy, baked feel.
Fresh Strawberry Cobbler